If you have ever been intrigued by the beauty and complexity of meticulously crafted fishing flies, then this article is for you. “The Basics of Fly Tying: An Introductory Guide” provides a comprehensive overview of the art of fly tying, offering beginners an insight into this fascinating hobby. Whether you are a seasoned angler or simply curious about the art, this guide will equip you with the fundamental knowledge and techniques needed to create your own custom flies. Get ready to embark on a rewarding journey that combines creativity, precision, and the joy of fishing.

1. What is Fly Tying?
1.1 Definition of Fly Tying
Fly tying is the art and craft of creating artificial flies that mimic natural insects, baitfish, or other organisms preyed upon by fish. These flies are used in fly fishing to attract fish and provoke strikes. By carefully crafting and replicating the appearance and behavior of various insects and creatures, fly anglers are able to fool fish into biting their flies. Fly tying involves the use of different tools, materials, and techniques to construct flies that are specifically designed to imitate specific species of fish prey.
1.2 The Historical Background Of Fly Tying
The practice of fly tying can be traced back thousands of years. Ancient civilizations, such as the Egyptians, used primitive materials like animal hair, feathers, and thread to create simple flies for fishing purposes. However, it was during the 14th and 15th centuries that fly tying began to evolve into a more sophisticated art form. English fly fishermen were the pioneers in the development of fly patterns and started to use hooks made of forged steel.
Over time, fly tying has gained popularity as both a hobby and a skilled craft. Today, it is practiced by anglers all over the world who enjoy the process of creating their own unique flies and experimenting with different patterns and materials.
2. Why Is Fly Tying Important?
2.1 Creating Customized Flies
One of the primary reasons why fly tying is important to fly fishing enthusiasts is the ability to create customized flies. By tying your own flies, you have complete control over the design, size, and color scheme. This allows you to tailor your flies to match the specific insects or baitfish that fish in your area typically feed on. By imitating the local food sources, you increase your chances of fooling the fish and successfully catching them.
2.2 Cost-effectiveness
Another significant advantage of fly tying is that it can be a cost-effective alternative to purchasing commercially produced flies. While high-quality flies can be quite expensive, especially if you need a variety of patterns, tying your own flies can save you a significant amount of money in the long run. Once you invest in the necessary tools and materials, you can tie multiple flies at a fraction of the cost of buying them from a store.
2.3 Relaxation and Stress Relief
Fly tying is also known for its therapeutic benefits. Many fly anglers find the process of tying flies to be immensely relaxing and stress-relieving. It offers a creative outlet and allows individuals to unwind and escape from the challenges of everyday life. The intricate and repetitive nature of tying flies can be meditative and provides a sense of calm and focus.

3. Essential Tools and Materials
3.1 Essential Fly Tying Tools
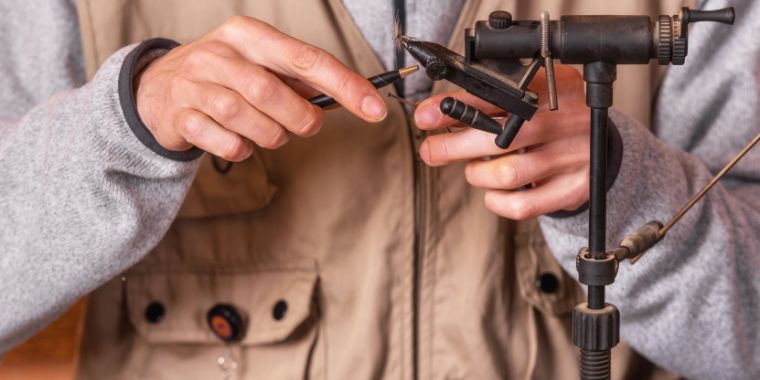
To get started with fly tying, you’ll need a few essential tools. These tools help you manipulate materials and secure them to the hook, allowing you to construct well-crafted flies. Here are some of the key tools every fly tyer should have:
3.1.1 Vise
A vise is a crucial tool that holds the hook securely in place while you tie the fly. It usually consists of a rotating jaw, which allows you to turn the fly and work on different angles comfortably.
3.1.2 Bobbin
A bobbin is used to hold the thread and control its tension. It allows you to smoothly wrap the thread around the hook and secure the materials in place.
3.1.3 Scissors
Scissors are essential for cutting and trimming various materials used in fly tying. A good pair of sharp, fine-tipped scissors is necessary for achieving clean and precise cuts.
3.1.4 Hackle Pliers
Hackle pliers are useful for handling delicate feathers and other materials that need to be wrapped around the fly. They provide a firm grip, ensuring precise placement and control while wrapping.
3.1.5 Whip Finisher
A whip finisher is a tool used to create a knot that securely finishes off the fly. It helps lock all the materials in place and ensures that the fly stays intact even during aggressive fish strikes.
3.2 Materials for Fly Tying
In addition to the tools, you’ll need various materials to tie flies. These materials can vary depending on the type of fly you’re tying and the target species you’re trying to imitate. Here are some of the common materials used in fly tying:
3.2.1 Hooks
Hooks are the foundation of any fly. They come in a wide range of sizes, shapes, and designs, each suitable for various types of flies and fishing scenarios. The type of hook you choose will depend on the species you’re targeting and the specific fly pattern you’re tying.
3.2.2 Threads
Threads are used to secure materials to the hook and create the body of the fly. They come in different thicknesses and colors, allowing you to add durability and aesthetic appeal to your flies.
3.2.3 Feathers
Feathers play a vital role in fly tying, especially for creating wings, tails, and other intricate details. Different types of feathers, such as hackle feathers or marabou feathers, provide lifelike movement and imitate the natural appearance of insects or baitfish.
3.2.4 Synthetic Materials
In addition to natural materials, synthetic materials like synthetic fibers, tinsels, and flash are commonly used in fly tying. These materials offer durability, increased visibility, and unique properties that can enhance the attractiveness of the fly.
4. Understanding Fly Anatomy
To become proficient in fly tying, it’s essential to have a basic understanding of the different parts of a fly. This knowledge will help you create accurate imitations and understand how changes to certain components can affect the fly’s appearance and behavior. Here are the key parts of a fly that you should be familiar with:
4.1 Hook
The hook is the foundation of the fly, and it determines the shape and size of the fly. It consists of the eye, shank, bend, and point. The eye is where the fly is attached to the fishing line, while the shank is the straight or curved portion of the hook that holds the materials. The bend refers to the curve or angle of the hook, and the point is the sharp tip that penetrates the fish’s mouth.
4.2 Thread
The thread is used to secure materials to the hook and build the body of the fly. It acts as the “glue” that holds everything together. The type of thread used will depend on the size and weight of the fly, as well as the desired appearance.
4.3 Body Materials
The body of the fly represents the abdomen or torso of an insect. It can be created using a wide range of materials, such as threads, furs, chenilles, or ribbing materials. The choice of body material will depend on the specific pattern and the type of insect you’re imitating.
4.4 Wing Materials
The wings of a fly imitate the wings of an insect or the fins of a baitfish. They provide crucial visual cues to fish and help the fly float or sink properly. Feathers, hairs, or synthetic materials like foam or synthetic fibers are commonly used for wing construction.
4.5 Hackle Materials
Hackle refers to the feathers that are wrapped around the hook to create the illusion of legs or additional body segments. Hackle feathers are typically sourced from birds such as roosters, chickens, and ducks. They come in various colors and sizes, adding lifelike movement and imitation of a struggling insect in the water.

5. Basic Fly Tying Patterns
There is a vast array of fly patterns available, each specifically designed to imitate a particular insect or baitfish species. Here are some of the basic categories of fly patterns:
5.1 Dry Flies
Dry flies are designed to float on the surface of the water and imitate adult insects that have landed on the water’s surface. They are typically tied with buoyant materials like deer hair or foam, allowing them to stay afloat.
5.2 Wet Flies
Wet flies are subsurface flies designed to imitate insects that are underwater or emerging from their nymphal stage. They are designed to sink just below the surface and can be swung in the water or retrieved in stillwater.
5.3 Nymphs
Nymphs are underwater insect imitations and represent the immature stages of insects. They are usually tied with materials that can imitate the nymphal body, legs, and tail, with a weighted head to help them sink.
5.4 Streamers
Streamers are large, impressionistic flies that mimic baitfish or other swimming creatures. They are typically tied with materials like feathers, fur, or synthetic fibers and are meant to be retrieved in a way that imitates the movement of prey.
Each category of fly pattern serves a specific purpose, and understanding their characteristics and how they imitate different prey can help you select the right fly for different fishing scenarios.
6. Step-by-Step Guide to Fly Tying
6.1 Fly Tying Process Overview
Now that you have a basic understanding of the tools, materials, and components of a fly, let’s walk through the step-by-step process of tying a fly:
6.2 Selecting a Pattern and Gathering Materials
The first step in fly tying is selecting a pattern based on the desired prey species or fishing conditions. Once you have chosen a pattern, gather all the necessary materials, ensuring you have the correct hook size, threads, feathers, and other materials required.
6.3 Preparing the Hook
Start by attaching the hook to the vise securely. Use the vise to rotate the hook, allowing you to access different angles easily. Thread the bobbin with the desired thread and create a thread foundation on the hook shank by making a few wraps.
6.4 Building the Body
The next step is to build the body of the fly. Wrap the thread along the shank, creating a smooth and even base. Depending on the pattern, you may need to add additional materials, such as chenille or ribbing, to create the desired body shape and texture.
6.5 Adding Wings and Hackle
Once the body is complete, it’s time to add the wings and hackle. Attach the wing materials to the top of the hook, ensuring they are positioned correctly. Then, select and prepare hackle feathers by stripping off excess fibers and attaching them to the hook shank. Wrap the hackle around the fly, making evenly spaced turns to create the desired effect.
6.6 Finishing Touches
To complete the fly, use the whip finisher to create a secure knot at the head of the fly. Trim any excess thread or materials, ensuring a clean and tidy finish. Apply a small amount of head cement or clear nail polish to the final knot to add durability and secure all the components in place.
7. Tips and Techniques for Fly Tying
7.1 Proper Thread Tension
Maintaining proper thread tension is essential for achieving neat and secure wraps around the hook. Too much tension can break the thread, while too little can result in loose wraps that may come undone. Practice finding the right balance by applying steady pressure while wrapping the thread and adjusting as needed.
7.2 Securing Materials
Ensuring that materials are properly secured to the hook is crucial for the longevity and effectiveness of the fly. Make sure each material is firmly attached before moving on to the next step. Wrapping the thread multiple times around the base of the material and adding a drop of head cement can provide extra security.
7.3 Working with Small Hooks
Tying flies on small hooks can be challenging due to limited space and delicate materials. Use smaller thread and appropriately sized tools to achieve precise wraps. Practice patience and take your time to avoid overcrowding the hook and messing up the proportions.
7.4 Blending Colors and Materials
Experimenting with different color combinations and material blends can give your flies a unique and realistic appearance. Use a variety of feathers, furs, and synthetic materials to create subtle gradients and mimic the natural variations found in insects or baitfish. Keep in mind the local fauna and try to match the prevalent colors and patterns.
7.5 Experimentation and Creativity
Don’t be afraid to experiment and unleash your creativity when fly tying. While it’s essential to learn and follow established fly patterns, adding your own personal touch and innovative twists can lead to exciting discoveries. As you gain more experience, feel free to modify existing patterns or even design your own custom flies.
8. Common Challenges and Solutions
8.1 Thread Breakage
Thread breakage can occur due to excess tension or using weak thread. To prevent this, be mindful of the tension you apply and ensure you’re using a high-quality thread suitable for the size and weight of the fly. If you encounter breakage, rewrap the thread and use a whip finish or half-hitch knot to secure the thread in place.
8.2 Difficulty Wrapping Materials
Certain materials like feathers or synthetic fibers can be challenging to wrap evenly around the hook. Practice proper technique and use hackle pliers, if necessary, to secure the materials and maintain control as you wrap. Don’t be discouraged by initial difficulties—like any skill, it improves with practice.
8.3 Uneven Proportions
Creating balanced and proportional flies takes practice and attention to detail. Pay close attention to the length and position of wings, tails, and other components, and make adjustments as needed. Take your time and compare each fly to reference materials or examples to ensure consistency.
8.4 Knots and Tangles
Knots and tangles in the thread can be frustrating and affect the quality of your fly. Regularly check the thread to ensure it is clear of any knots or snags. If you encounter a tangle, gently pull the thread to unravel it. In extreme cases, it may be necessary to cut the thread and start over.
8.5 Misjudging Fly Sink Rate
Fly sink rate refers to how quickly or slowly a fly descends in the water. Misjudging the sink rate can affect your ability to present the fly at the desired depth and attract fish. Experiment with different materials, weights, and hook sizes to achieve the desired sink rate. Additionally, adjusting the retrieval speed can also influence the fly’s depth.
9. Fly Tying Safety
9.1 Handling Hooks Safely
When working with hooks, it’s important to handle them with caution to avoid accidental injuries. Be mindful of the sharp point and keep your fingers away from it to prevent accidental punctures. Consider using tools like tweezers or pliers to manipulate hooks during the tying process.
9.2 Protecting Your Eyes
Flying tying involves working with small and sharp materials, which can pose a risk to your eyes. Wear protective eyewear, such as safety glasses or magnifying goggles, to shield your eyes from any potential projectiles or flying debris.
9.3 Proper Ventilation
Certain fly tying materials, such as resins or glues, can emit fumes that may be harmful when inhaled. Ensure that you are working in a well-ventilated area to minimize exposure. Consider using a ventilation fan or working near an open window to improve airflow and reduce the concentration of fumes.
10. Exploring Advanced Fly Tying

10.1 Advanced Techniques
As you become more proficient in fly tying, you can explore advanced techniques to enhance the complexity and realism of your flies. Techniques such as dubbing loops, parachute posts, or advanced wing construction can take your flies to the next level. Invest time in learning and practicing these techniques to expand your skill set.
10.2 Incorporating Realistic Elements
For those seeking a challenge, incorporating realistic elements into your flies can be a rewarding endeavor. This involves using advanced tying techniques, unconventional materials, and innovative design strategies to create flies that closely resemble specific insects or baitfish. By mastering these techniques, you can create flies that are virtually indistinguishable from their natural counterparts.
10.3 Designing Custom Flies
Once you have acquired a solid foundation in fly tying, you can explore the realm of designing custom flies. This involves creating your own unique patterns and experimenting with new materials, colors, and construction techniques. Designing custom flies allows you to express your creativity and tailor your patterns to specific fishing situations or personal preferences.
Fly tying is a captivating combination of art, science, and craftsmanship. With practice and dedication, it opens up a world of possibilities for anglers to create flies that not only deceive fish but also reflect their individual style and creativity. So grab your tools, gather your materials, and prepare to immerse yourself in the captivating and rewarding world of fly tying. Happy tying!

Subscribe to get our FREE ebook
The Ultimate Fly Fishing Starter Guide
and receive fly fishing tips and tricks to help you catch more!